


Updated September, 2022
Dolby Atmos is now available for your home and it will change the way that you experience audio. The 3D immersive surround sound format was first unveiled back in 2012 and installed in a select group of movie theaters around the world. Since then, hundreds of movies have been encoded and released in the object-based surround sound format as well as TV series and even music.
Dolby and its partners in consumer electronics have brought that same theatrical experience to the living room or dedicated home theater. But if you want to bring the Dolby Atmos experience home, you're going to need to upgrade some of your gear. Here are the basics you'll need to consider when deploying a Dolby Atmos system at home.
Check out our 2022 Recommended Home Theater System, complete with Projector, Dolby Atmos receiver and 5.1.2 Speakers
The good news is that Dolby announced that Atmos-encoded content can be delivered via existing Blu-ray players and streaming set top boxes. Dolby has figured out a way to enhance the existing Dolby TrueHD and Dolby Digital Plus surround sound formats to include the information required by Dolby Atmos. So your existing Roku box or FireTV stick can deliver Dolby Atmos titles over streaming services such as Vudu, Netflix, Disney+, HBO Max or Amazon Prime. And your current Blu-ray player will be able to deliver the new Dolby Atmos-compatible titles using Dolby TrueHD. Just set your Blu-ray player to bitstream output (and disable any secondary audio), pop in a Dolby Atmos Blu-ray Disc and you're good to go, at least from a player perspective.
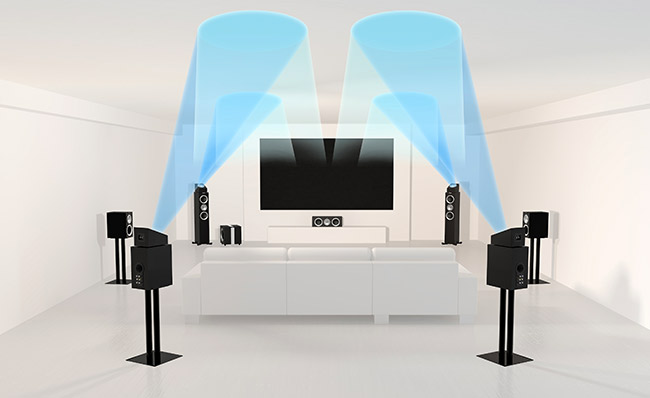
In terms of system enhancements, you're going to need a few more speakers. These can be traditional in-ceiling speakers that provide sound from above or they can be Dolby Atmos-enabled speakers. The latter can deliver that overhead sound, without actually being installed on the ceiling. Speaker companies such as KEF, Atlantic Technology, Definitive Technology and Klipsch (among others) have all shown Dolby Atmos-enabled "elevation modules." These speakers are designed to sit on top of your current speakers and bounce sound off the ceiling in order to create sound from above. Companies are even building these top-firing drivers into the front or rear speakers of a surround sound system so you'll have fewer speakers to buy and install.
Keep in mind that if you do go with the top-firing speakers, you'll need to make sure your ceiling can reflect sound back toward the listening space. These elevation modules work best when the walls and the ceiling meet at right angles and the ceiling is not too high (under 12 feet from floor to ceiling). Also, textured "popcorn" type ceilings don't always reflect sound well. Smooth sheetrock type ceiling construction is best for reflectivity. If you've got high or vaulted ceilings, consider going with dedicated height speakers mounted on or in the ceiling.
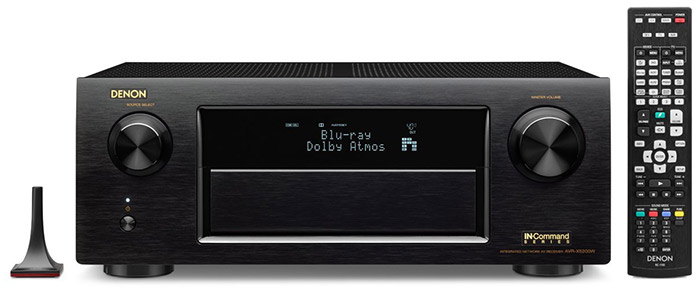
Whichever speaker options you choose, you're going to need the most important piece of the Dolby Atmos equation: the Dolby Atmos-enabled receiver or preamp/processor. The receiver or pre/pro is the "brains" of the operation. It's what takes the Dolby Atmos-encoded movie or music program from your Blu-ray player or streaming set-top box and decodes it into the channel-based signals that your speakers can understand.
A receiver includes all the decoding, source switching, processing and amplification to drive your speakers. A preamp/processor is similar but includes no power amps so it can't drive speakers directly -- it needs separate power amps for that. High-end home theater systems are typically built around preamp/processors and separate power amps, but today's top of the line receivers can give separates a run for their money. Just be sure your receiver or pre/pro supports the number of speakers you want to use for your specific listening room.
In standard surround sound, we've gotten used to identifying the number of channels in a system using two numbers with a dot in between them: 5.1 means five surround channels (front left, front center, front right, surround right and surround left) and one LFE channel which is typically sent to a powered subwoofer. A system that uses two subwoofers instead of one is normally referred to as ".2" (e.g., 5.2 or 7.2) even though both of those subwoofers are typically driven by a single LFE channel from a receiver.
In Dolby Atmos-land, we now need additional speakers above the listener, so we're going to need new nomenclature. It's pretty simple: just add a number to the end for the number of height speakers you're using. So a Dolby Atmos 5.1.2 system uses five surround channels, one subwoofer and two height speakers. A Dolby Atmos 7.2.4 system uses seven surround channels, two subwoofers and four height speakers. See how that works? It's pretty straightforward. You can read more about these formats in our guide to surround sound formats.
The minimum configuration for Dolby Atmos at home is 5.1.2 (traditional five-channel surround plus two height speakers) but the Dolby Atmos spec for home can go all the way up to 24.1.10 (yes. that's 35 speakers!). Based on the demos we've heard, we'd recommend four height channels for best effect, so that means a 5.1.4 or 7.1.4 configuration for most rooms. But if you're on a budget, or are outfitting a smaller room, you can also get great immersive surround sound with a 5.1.2 system.
The key to look for in your receiver choice is how many amplifier channels it has. A 7-channel receiver (typically referred to as "7.1" or "7.2") with Dolby Atmos decoding can support a 5.1.2 Dolby Atmos set-up or a traditional 7.1 channel surround system. A 9-channel receiver (9.1 or 9.2) can support Dolby Atmos in a 5.1.2, 5.1.4 or 7.1.2 configuration. While you can get a good quality 5.1.2-channel receiver (7-channel) for about $450-$700, a 5.1.4-capable receiver (9-channel) may set you back $1300 or more. Also keep in mind that some receivers support more speakers than they can actually drive, so you may need to add on a stereo power amplifier in order to get your preferred configuration. This was the case with our own Greg Robinson who describes his Dolby Atmos Upgrade Journey here.
Within the last few years, several companies, including Sonos, LG, Sony and Samsung (among others) have released sound bars which include support for Dolby Atmos as well. While these don't normally compare in sound quality to a component receiver and separate speakers, they can be a simple and relatively affordable way to get a taste of that Dolby Atmos sound.
Now Bring on the Content!
Once you've got all the hardware elements in place, you're going to need some content. Streaming services including VUDU, Amazon Prime Video, AppleTV+, Disney+, HBOMax and Netflix all currently support Dolby Atmos. Most streaming devices including the most recent Fire Stick 4K and Roku Stick 4K support Dolby Atmos. Also, recent TVs which include ARC or eARC support can pass a Dolby Atmos stream to a compatible receiver or sound bar. Music services such as Amazon Music Unlimited, Tidal and Apple Music also support Dolby Atmos (sometimes called "immersive sound" or "Ultra HD sound"). So if you subscribe to these services, be sure to check out the Dolby Atmos titles available on these platforms.
On the Blu-ray front, several hundred discs are available now with Dolby Atmos soundtracks. Check out or list of Which Blu-ray Discs Have Dolby Atmos for details.
To tide you over until you've built up a nice collection of content, Dolby Atmos receivers and processors also include a Dolby Surround upmixer feature, which extracts height information from standard surround sound mixes. We've tested it on a lot of different types of content and find that it adds a nice immersive ambience to the sound.
Once you've got all the gear, just plug it in: HDMI cables from sources (Blu-ray player, cable box, streaming box) to the receiver, HDMI cable from receiver to TV and speaker cables to all speakers. For a 5.1.2 system, you'll need seven speaker cables plus a subwoofer cable (usually with an RCA plug on both ends). For a 7.1.4 system, you'll need 11 speaker cables plus a subwoofer cable.
If you're going to use streaming apps on your TV, then make sure to use a high-speed HDMI cable with network capability in order to take advantage of ARC (Audio Return Channel) or eARC (enhanced Audio Return Channel). This will allow you to pass high quality audio - including Dolby Atmos - from the TV back to the receiver and out to all of your speakers.
All speakers should be around the same distance from the listening position, placed outward roughly in a circle around the listener. Put the front left, center and front right speakers across the front of the room and the rear surround speakers behind the listening position. If you're using a 7.1.2 or 7.1.4 system, then side surround speakers go beside the listening position (along the side wall), rear surround speakers go behind you. If the height speakers are integrated into the other speakers, then you will still need to run a separate speaker wire set to each of those in order to get the height effects.
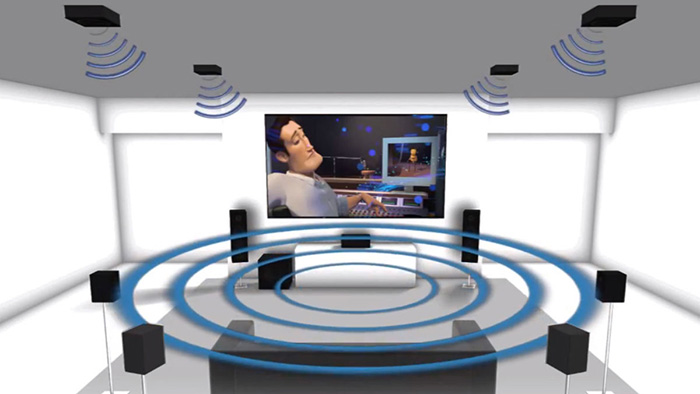
If you use two discrete ceiling speakers, place them on the ceiling slightly forward of the listening position, or high on the front wall, pointed down toward the listener. If you use four height speakers, then position one pair in front of and one pair behind the listening position. See the images above from Dolby for their suggested speaker placements for Dolby Atmos.
Need a more detailed hands-on account of how to do the installation? Check out Greg Robinson's Dolby Atmos upgrade journey:
The final step once everything is plugged in: calibrate it. All good home theater preamps and receivers have a built-in speaker calibration function that runs test tones and a microphone to assure that all speakers are reproducing the correct signal level. After that's done, give it a listen as you sometimes need to make some manual tweaks to speaker levels and subwoofer placement in order to get the best sound.
Once you have it all set up, fire up your favorite Dolby Atmos enabled movie on Blu-ray Disc or a streaming service and enjoy that immersive surround. You may never want to go to the movie theater again.
More Information:


