


Are you trying to figure out how to rip your CDs to your computer with iTunes? It may be easier than you think. If you don't care about ultimate audio quality, you can rip CDs to iTunes with the basic settings. But if you want to step up the sound quality, so you can enjoy your music on today's and tomorrow's devices, a few tweaks can make a world of difference.
iTunes Import Settings
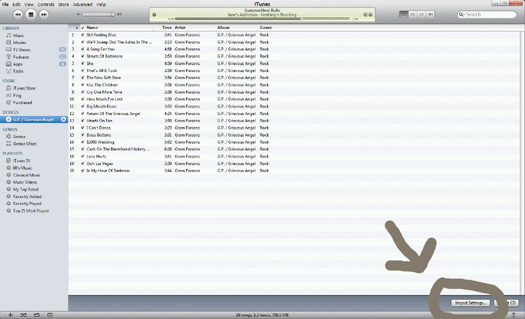
When you first insert a CD, iTunes asks if you would like to import the CD you just inserted. Select "No." You heard me, just say, "No."
In the lower right hand corner of the iTunes window is a button labeled "Import Settings." As you can guess, you should click this.
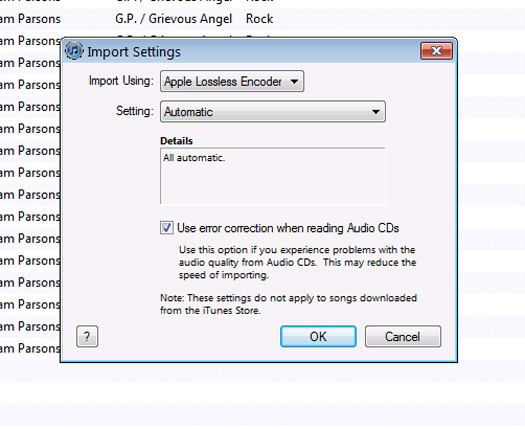
The Import Settings menu has a variety of options. The "Import Using" drop-down menu selects what encoding format you want iTunes to use.
But before we get to those options, make sure you enable (via the check box at the bottom of the Import Settings window) "Use error correction when reading Audio CDs." This option may take a little longer to rip a CD, but it ensures that every bit of the audio on the CD is captured. This is a must to ensure the best sound quality. There's really no reason not to enable this, unless you find your drive takes a really long time to rip, which it shouldn't. If it does, then stop reading this right now and buy a new CD drive. Don't worry. We'll wait...
AAC Encoder: Advanced Audio Coding is the default audio codec for iTunes and all Apple products. It is generally considered to be a better sounding compression compared to the older MP3 codec at the same bit rates. If you select AAC, the Setting drop-down menu gives you the option of High Quality (128 kpbs), iTunes Plus (256 kbps), Spoken Podcast (64 kbps), and Custom. Never use the Spoken Podcast option for music. Generally speaking, iTunes Plus will sound better than High Quality, but will create files that are roughly double in size. Each four minute song will be around 8 megabytes instead of 4.
If you chose the Custom option, you can select up to 320 kbps. You also have the ability to change the Sample Rate and Channels. Unless you know what you're doing leave these as Auto, as changing them will almost always lead to a decrease in sound quality.
The "Variable Bit Rate Encoding" option allows the encoder to vary the bit rate depending on the complexity of the sound throughout the song. I recommend this. It keeps the file size roughly the same, but offers potential increases in sound quality. The "Use High Efficiency" check-box is for low bit rate encodings, and does next to nothing at higher bit rates. The same with the "Optimize for Voice" check-box.
A four minute song at 320 kbps with VBR will take up approximately 10 megabytes. But remember, the higher the bitrate the better (generally speaking), and if you encode your music at very high quality, then it will be unnecessary to re-rip your CDs in the future as you get higher quality headphones or a state of the art home theater system.

AIFF Encoder: Audio Interchange File Format is the Apple/Mac version of a Windows-based PC's WAV files. It is uncompressed PCM. If you have oodles of hard drive space, and fear any compression, this is your option. There are no real settings here, other than to decrease sample or bit rates. But if you're encoding in a lossless format, why would you decrease the sample or bit rate? (Answer: You Wouldn't. So Don't). You can increase the sample rate to 48kHz, but you could have playback issues if the device your playing back on can't handle 48kHz files. A four minute song will take up approximately 40 megabytes in AIFF format.
Apple Lossless Encoder: If sound quality is your goal, but you don't have unlimited hard drive space, Apple Lossless is your choice. Apple Lossless, when played back, will be the exact sound you heard as if you played back the CD directly. But unlike AIFF (which boasts the same audio quality potential), Apple Lossless takes up much less storage space on your hard drive or your iPod oir iPhone's internal memory. A four minute song will take up approximately 22 megabytes in Apple Lossless format.
MP3 Encoder: The old-school MPEG 2 Audio Layer 3 has near universal compatibility - virtually all portable players support MP3, as do ancient enemies Windows Media Player and iTunes. However, MP3 isn't the most efficient codec due to its advanced age. The three options here are Good Quality (128 kbps), High Quality (160 kbps), and Higher Quality (192 kbps). At 128 kbps, sound quality is rather poor. Stepping up to 160 is a noticeable improvement, and 192 even more so. The better your headphones or speakers, the more noticeable the differences become.
IF you choose to rip to MP3, a four minute song will take up a little less than 4 megabytes at 128 kbps, a little more than 4 megabytes at 160, and a little more than 5 megabytes at 192 kbps.
The Custom option lets you chose bit rates up to 320 kbps, and gives you the option of VBR (like AAC). Here, though, you also get to choose the Quality of the VBR in seven steps. No reason, really, not to choose Highest. The "Smart Encoding Adjustments" allows iTunes to optimize the encoding for file size, not for sound quality. Again, if you're choosing Custom, at this point sound quality is likely a priority, so I'd leave this unchecked. Bit rates of 256-320 offer a good compromise between file size and sound quality.
A four minute song will take up approximately 9 megabytes at 320 kbps with VBR set to Highest quality.
WAV Encoder: The last option is the WAV encoder, which is an uncompressed PCM file format much like AIFF. This is exactly what's on the CD transferred verbatim to your hard drive. A four minute song will take up approximately 40 megabytes. This file format can be played back on pretty much everything that can play digital audio. Big 'Ole waste of space, though as it uses no compression, lossy or otherwise.
Best Picks: If you want decent sound quality, but your iPod doesn't have a lot of space, I'd pick AAC or MP3 at one of the higher custom bit rates with VBR. You'll likely be able to only fit about half the songs you would have fit at the lower bit rates, but even over headphones they'll sound a LOT better.
If sound quality is paramount, or you'll be listening over real speakers, I'd rip Apple Lossless. No question. AIFF and WAV are fine if you have older equipment that won't play Apple Lossless, but otherwise Lossless is the way to go. Also, for archiving, Lossless or uncompressed offer the best "futureproofing" of your audio. This is because once something is compressed with a lossy codec, what is taken out is lost forever.


