


A show of hands, if you will: how many of you have flat panel TVs in the bedroom? Mmmhmm, okay. That's a good number of you. Second question: how many of those flat panel TVs are wall mounted?
And there go the hands.
That's a shame, because mounting a flat panel television can be an incredibly easy undertaking. Sure, you can go the whole-hog route, tear into your sheetrock, route cables through the walls, relocate electrical outlets, but if you prefer a simpler (and less permanent) approach, all you really need to mount your TV is a few tools, an hour or so of free time, and of course the mount itself.
For my recent mounting project in the master bedroom (You in the back -- quit your giggling!) I installed OmniMount's Power40 Remote Controlled Motorized Cantilever Mount (reviewed here) using only the following:
Everything else I needed, including the proper drill bit and an adorable little bubble level, were included in the OminMount package. Depending on the manufacturer of the mount you select, you may need to provide your own level and drill bit, though.
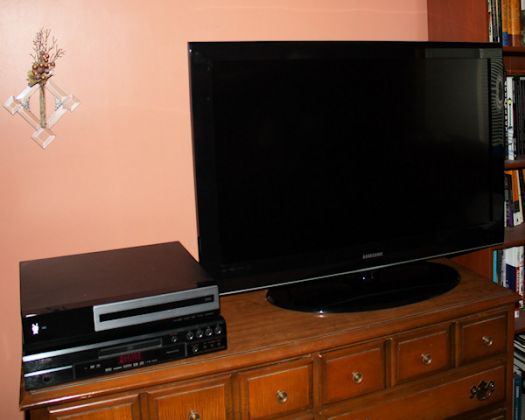
As you can see in the image below, before mounting my Samsung LN40A550 LCD TV, it pretty much hogged my wife's dresser. Between, the TiVo, and DVD player, the dresser top was completely cluttered, and from an aesthetic point of view it was sort of a ridiculous look.
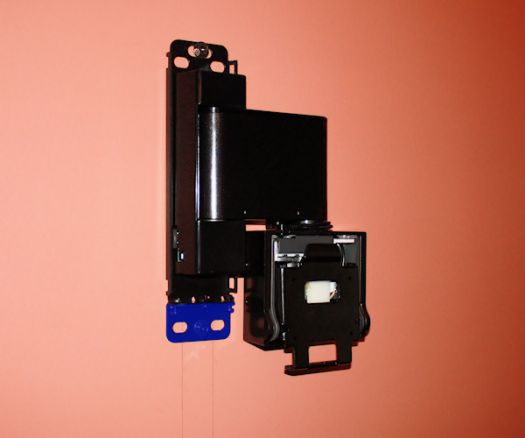
The first step in the mounting process is to secure the mounting plate (highlighted in blue below) to the back of the TV. In my case this was a simple step, since the LN40A550's screw hole pattern is standard VESA compliant 200mm x 200mm, which the Power40's mounting plate handles with no problem. Before you purchase a mount, make sure it's designed to handle your TV. Most mount manufacturers include a search tool on their website where you can plug in the model number of your set and see which mounts are designed to hold it.
Also note that the screw holes on the back of your flat panel may be covered with plastic or rubber plugs, but these shouldn't be too hard to remove.
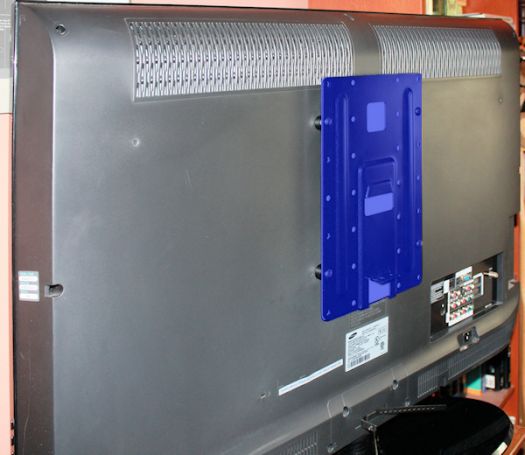 Note: the mounting plate is not, in fact, Very Berry Blue. It's merely highlighted here for the sake of clarity
After attaching the mounting plate, measure from the top of it to the top of your display. You'll use that measurement when deciding on the vertical placement of your mounting template. To find the right horizontal placement, though, you're going to need a stud finder. Once I figured out roughly where I wanted the center of my display to be, I started searching to the left for the nearest stud. With the Power40, I only needed to locate one, but depending on your mount you might need to find one each to the left and right.
Once I marked the location of my stud with a pencil, and made a few marks indicating where the top of the mounting bracket should go to put my TV at the right height, I used my own larger level to keep the template steady, and stuck it to the wall with double-sided tape (also included with the OmniMount).
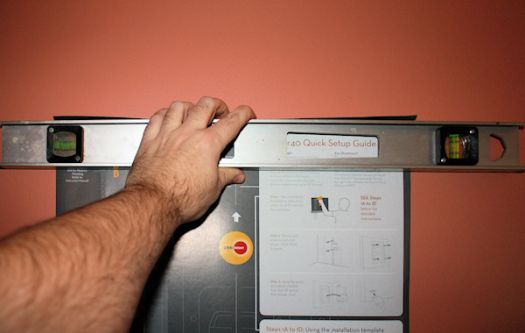
With the template in place, it's a good time to take a few more measurements to ensure that everything is going to fit before you start drilling holes. As they say, "measure twice, cut ONCE."
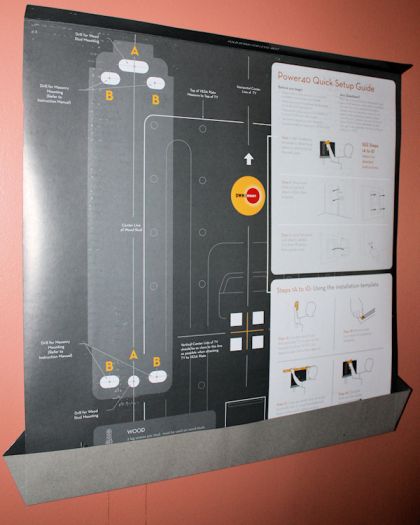
When you're sure that everything is where it needs to be, go ahead and drill your guide holes according to the template. Here, the holes marked "A" are for single-stud installation, and the holes marked "B" are for installations involving masonry walls.
 Note: The Very Berry Blue comment from above still applies here
Once you've got your holes drilled, it's a snap to install the wall assembly. With the Power40, the assembly separates into two pieces, with the smaller bottom piece (highlighted in blue above) intended to be installed first, since it's smaller, lighter, and easier to keep level while mounting. Once it's in place and bolted in, it provides a stable platform for holding the heavier top piece level until you can get it bolted down, too.
Once you've got the wall assembly in place, completing the installation is as easy as aligning the tongue and groove on the front of the assembly and the back of the mounting plate already attached to the TV, then attaching a few screws at the bottom to hold them together.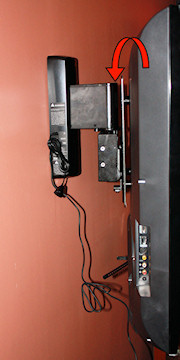 It's critical to remember to remove the stand from your display before attempting this step. Not that I forgot, or anything, but you might. I'm just sayin'
In my case, despite the fact that OmniMount's instructions call for connecting the power cable and IR receiver last, it was easier for me to go ahead and power up the mount and extend it all the way out so I could get behind the TV back it onto the mounting assembly, so I could see what I was doing. A basic mount will not have an IR receiver or power cord, so if you're working with one of those, please ignore the previous sentence.
If you're not a CPW (Certified Professional Wookiee), you might want to ask for help during this step, especially if your display is larger than 27 inches or so. A 40-inch LCD might not weigh much, but it can be decidedly cumbersome.
In lieu of an assistant, a strategically placed mirror might also do the trick, but it's better to have a friend or relative give you a hand here, if for no other reason than to have someone to blame if anything goes wrong.
After you've got the TV mounted and secured, there remains, of course, the matter of wires dangling down the wall.
As I said up top, I wanted to keep this installation simple, not to mention temporary, since the missus and I only plan to stay in this house a few more years, and there's always the chance we (she) might decide to completely rearrange the bedroom furniture for no good reason whatsoever that I can think of. *Ahem*
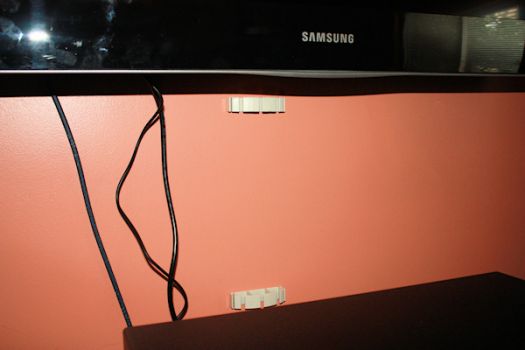
So, instead of routing the cables through the wall, I opted to use one of OmniMount's Cable Management Kits (CMK). Installation of the Cable Management Kit is even easier than the mount: simply screw a couple of cable channels in place (two for every sixteen inches of cable you need to cover)...
... Guide the cables through any of the three available channel slots...
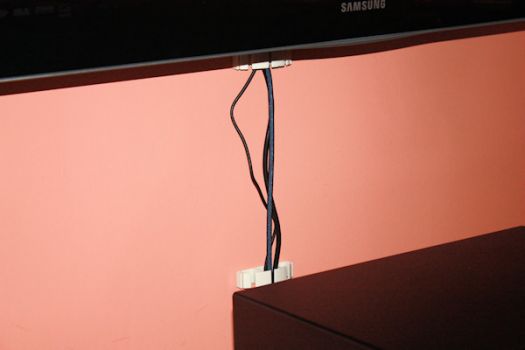
... And snap a cover into place. Each Cable Management Kit comes with three 16- by 4.3-inch covers, one 90° elbow, and two end caps, all of which can be painted or wall-papered to match your décor.
The result? Well, I think it speaks for itself:
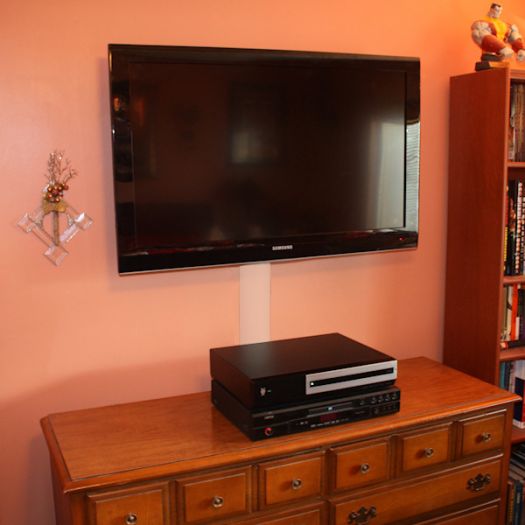
And it took less time to do it than it did to write about it.
The bottom line? If you're reasonably handy and can follow simple instructions, installation of a flat panel TV mount for your LED, LCD or plasma HDTV is not as intimidating a job as you might think, and the results can be well worth the effort.
Where to Buy:


