


Ceiling projector mounts aren't sexy, but they can be incredibly useful if you want to get your projector out of the way, and get the highest performance out of it. How can a simple ceiling mount enhance the performance of a projector, you might ask? By positioning a projector at its ideal height relative to the screen, you can eliminate the need for "keystone." Keystone is the projector control which adjusts the shape of your screen to compensate for a projector being too high or too low. Keystone is incredibly useful for getting your projected image to be a proper rectangle, but it robs a projected image of detail by moving some of the available pixels outside the visible screen image.
When I was looking for a ceiling mount for our Epson Home Cinema 2000 projector, I tried a few different solutions. First I built a hanging shelf which positioned the projector about 14 inches below the ceiling. This wasn't ideal as it required me to position the projector at an extreme angle in order to hit the screen, and that required a significant amount of keystone (which, as noted above, is bad for picture detail). The second mount I tried was an inexpensive ceiling mount from "VideoSecu" which is availble on Amazon for under $25. This worked out pretty well, but still didn't get the projector to the exact right height, so I still needed a bit of keystone to square off the image.
Getting the right projection mount was going to take a bit of research. In fact, I should have done this at the beginning. It turns out that the Epson Home Cinema 2000 projector has a fairly unusual throw pattern. Instead of projecting the image straight ahead, which would require the lens to be directly in front of the screen, most front projectors offset the projected image a bit, either above or below the lens. This is useful as it allows you to position the projector on a coffee table and still get a nicely squared off image at a decent height on the wall. It also means that you can mount the projector upside down pretty close to the ceiling (out of the way) and still get that perfect screen geometry without using the keystone controls. The Home Cinema 2000 is no exception, but it is a bit more extreme in its image offset than some other projectors, with about 92 percent of its image above the lens centerpoint and only 8 percent below it.
Side note: finding out your specific projector's vertical offset can be a challenge as not all manufacturers publish this spec. If you have an Epson projector, you can try plugging it into their screen throw calculator which will get you in the right ballpark. For other projectors, check with the manufacturer before purchasing a mount.
As with any projector that lacks lens shift (as this one does), getting the image perfect means precise placement of the projector from the ceiling. If you haven't permanently mounted your screen already (which I had), then you will have some wiggle room, but if you are trying to hit a very specific spot for a fixed screen, you're going to have to do some math and careful positioning.
Our 92-inch diagonal screen is about 45.5" in height and is mounted seven inches below the ceiling. The Epson's lens throw pattern is 8% above the lens, but you flip this when doing a ceiling mount since the projector will be upside down. This means the lens center point needed to be about 3 1/2 inches below the screen top, or 10.5 inches below the ceiling. Considering the center of the lens is about 2 inches from the bottom of the projector, this meant I needed to mount the projector about 8.5 to 9 inches below the ceiling in order to get a squared off projected image without keystone.
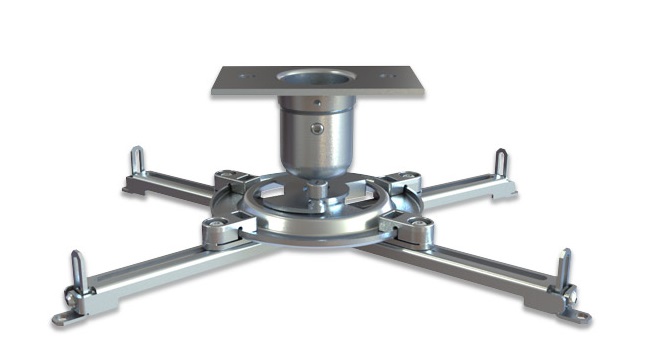
Looking at the specs of Epson's Universal Projector Ceiling Mount, and considering that it uses a standard 1.5" diameter pipe for extensions, I thought I might have a winner. On its own (without extensions), the mount is about 4.2" high. The feet that attach to the projector have about an additional inch of height adjustment. The mount also comes with an extension column "connector" but not an actual extension column. This connector is basically a threaded (female on both sides) tube with a gap on one side that allows you to connect an extension column or piece of 1.5" diameter threaded pipe to extend the length of the mount. The gap in the connector is to allow you to run power and interconnect cables through the extension column for a neat installation.
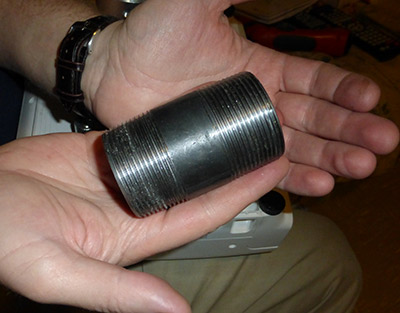
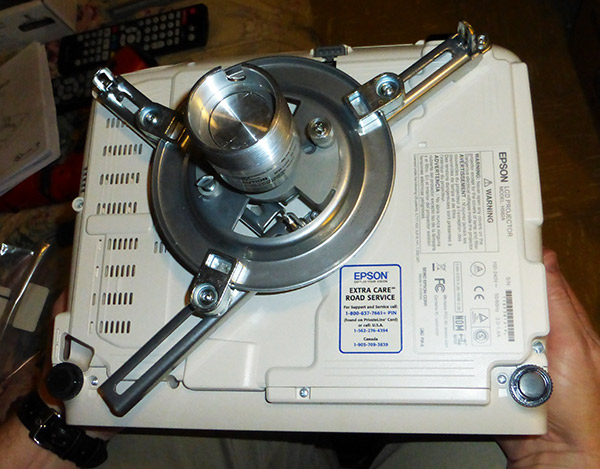
Now that I had all the parts, it was time to mount the projector. There are basically four components: a ceiling plate, the mount itself, the adapter plate (which attaches to the projector), and the extension column connector which I lengthened using the 3-inch nipple. Since the Epson Home Cinema 2000 projector has only three mounting holes, but the adapter plate has 4 feet, I removed the extra foot which was as simple as a few turns with a hex wrench (included). Coordinating the attachment of the remaining three feet to the projector was a little tricky as the mount holes on the projector are pretty close to each other. You can see exactly how I placed mine in the photo. The mounting screws for this were included in the box with the mount.
Once placement of the plate was final, I tightened up a few bolts to secure the plate to the projector, then loosely assembled all of the parts together by screwing the various parts into each other and securing the adapter plate to the mount with the included screws.
To determine the best place for the mounting plate on the ceiling, I used a measuring tape to mark a straight line from the top center of the screen to an area of the ceiling about 9 feet from the screen. I confirmed that the distance and height of the projector would be correct by putting up a cross-hatch pattern and manually holding the projector approximately where it would live once permanently installed. I made sure to position the ceiling plate so that the projectors' lens would be aligned as closely as possible with the center of the screen. Getting this wrong would require horizontal keystone adjustment, which is just as bad as vertical keystone. Marking the holes for the ceiling plate was a two-person job as I had to hold the projector and mount against the ceiling while my assistant marked the holes (so I would know where to drill).
Since the placement requirements are so precise, I wasn't able to guarantee that the mount would be attached to a wooden stud inside the ceiling. I purchased heavy duty hollow wall anchors to use with the thick metal mounting screws (included) to secure the mounting plate to the plaster and lathe ceiling. This wouldn't be the best idea for a large 50-pound projector, but considering the Home Cinema 2000 weighs about 6.5 pounds (plus another three pounds for the mount), this method would be secure.
The last step was to drill the mounting holes, secure the plate to the ceiling with the included screws, and attach all the pieces by twisting them together. When I did so, I was happy to see that the height was perfect. I was able to throw a 92-inch geometrically correct image right onto the fixed screen without the use of vertical or horizontal keystone. Success! All that remained was to lock the extension pipe and connector in place using the set screws (included), then make some fine pitch adjustments to line the image up on screen.

The mount offers about 15 degrees of pitch adjustment, both horizontally and vertically. This is accessed by loosening a single hex screw on the mount. This part was a little tricky, as it required holding the projector precisely in place while tightening the adjustment screw. But after a couple of tries, I was able to get it locked into place. I verified that the projector was aligned correctly with some test patterns and actual movies and TV shows.
Turn-Ons
Turn-Offs
Final Thoughts
Overall, the Epson Universal Projector Mount proved to be an excellent choice for an affordable ceiling mount for the Epson Powerlite Home Cinema 2000 projector. Its compatibility with standard 1.5" pipe means you can customize the height to your specific requirements for a nominal additional expense. Adjusting the fine vertical and horizontal pitch is a bit tricky, but with some patience you should be able to get perfect screen geometry and the highest performance out of your projector.
Manufacturer's Contact Information:
Epson America, Inc.
3840 Kilroy Airport Way
Long Beach, CA, USA 90806
Telephone: 1-562-981-3840
Fax: 1-562-290-522
On the Web: www.epson.com
Where to Buy:
| Overall | |
|---|---|
| Value | |
| Performance | |
| Features/Ergonomics |


